Example Stone Veneer Projects in Federal Way

Every example below is one stone veneer job from start to finish. You see the house or building, the owners’ request, the layers that go behind the stone, the time on site and a rough cost.

None of them is a past job, a client or an address. Each is built from house ages in the area, the work that kind of job needs and current price ranges, to help you plan before asking for a quote.

Cracked brick front replaced with stone

Example project
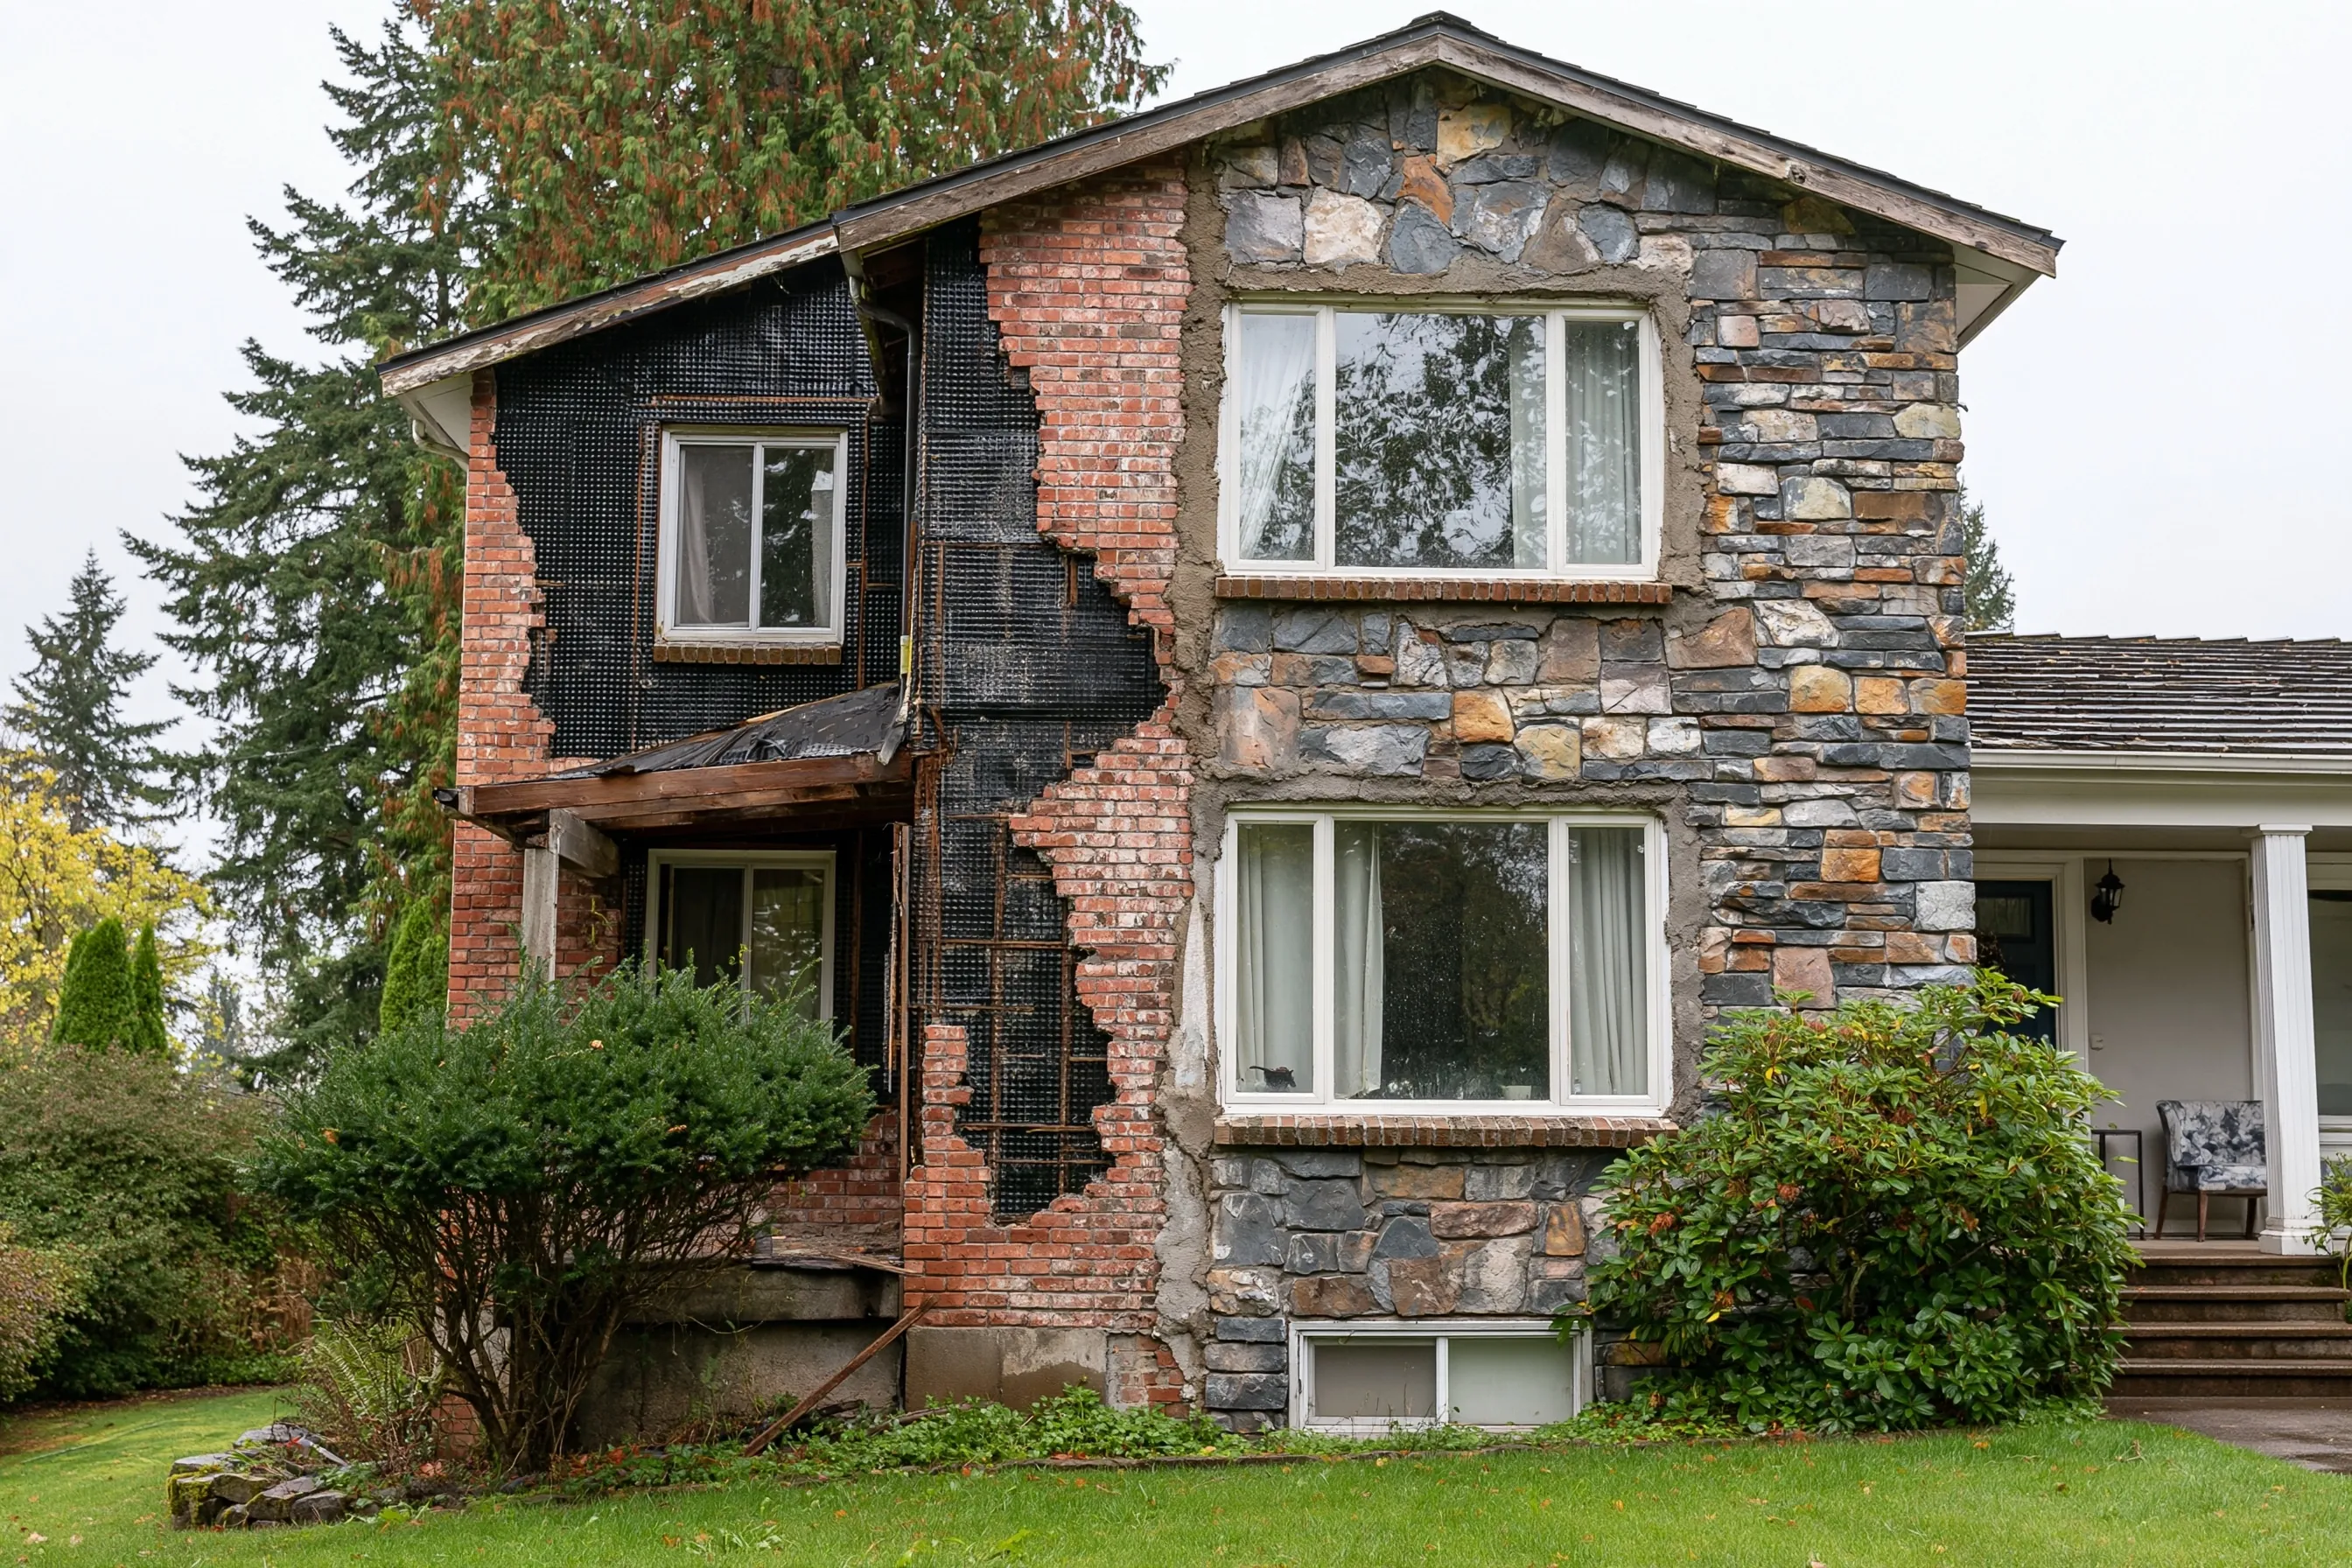
Two-story house front with old red brick partly taken off down to black lath and the rest of the wall already faced in stone
Home
1980s house in Federal Way
Original request
Take off the cracked brick on the front and put stone in its place
Wall
Brick facing on the two-story front wing, about 350 sq ft, with five windows and a small roof over the lower left one
Stone
Multicolor manufactured stone and its matching corners
Behind the stone
New water barrier, flashing at the openings, metal lath and a scratch coat
Timeline
About two weeks, one half of the wall at a time
Estimated cost
$15,800

Scope of work

The old brick taken off and hauled away, and the sheathing behind it checked. A new water barrier, flashing at the windows and the small roof, metal lath and a scratch coat. Manufactured stone with corner pieces set in mortar, and new trim at the openings and along the base. The brick tear-off is in this price. Repairs to wet sheathing, if any turn up, are priced on top.

Project overview

In this example, the owners of a 1980s house in Federal Way have brick facing on the two-story wing at the front that has cracked and pulled away from the wall in places. They want stone instead, and they want to know the wall behind it is dry.

We take the brick off rather than cover it. A new face over cracked brick would hide the problem, not fix it. We work one half of the wall at a time, so it is never open to the rain for long, and we can see any water damage before the new layers and the stone go on.

The goal

The goal is a stone front on a sound, dry wall, with the old cracked brick gone for good.

Process

  1. Before work Stone chosen from samples, and the full scope described to the city to see which permit it needs.
  2. Week one Brick off the right half, sheathing checked, then water barrier, flashing, lath, scratch coat and stone.
  3. Week two The same on the left half and around the small roof, then trim fitted and the site cleaned up.

Planning right

  • Settle early how the stone meets the brick ledge on the foundation.
  • Ask for any repair to the wall behind to be priced on its own before it gets covered.
  • Stone is thicker than brick, so the window trim is planned with it.
  • Keep the stone a few inches above the soil and paving, with a weep screed at the base.
Get a free quoteMore about exterior stone veneer

Stone on the half wall and post between the entry and the living room

Example project

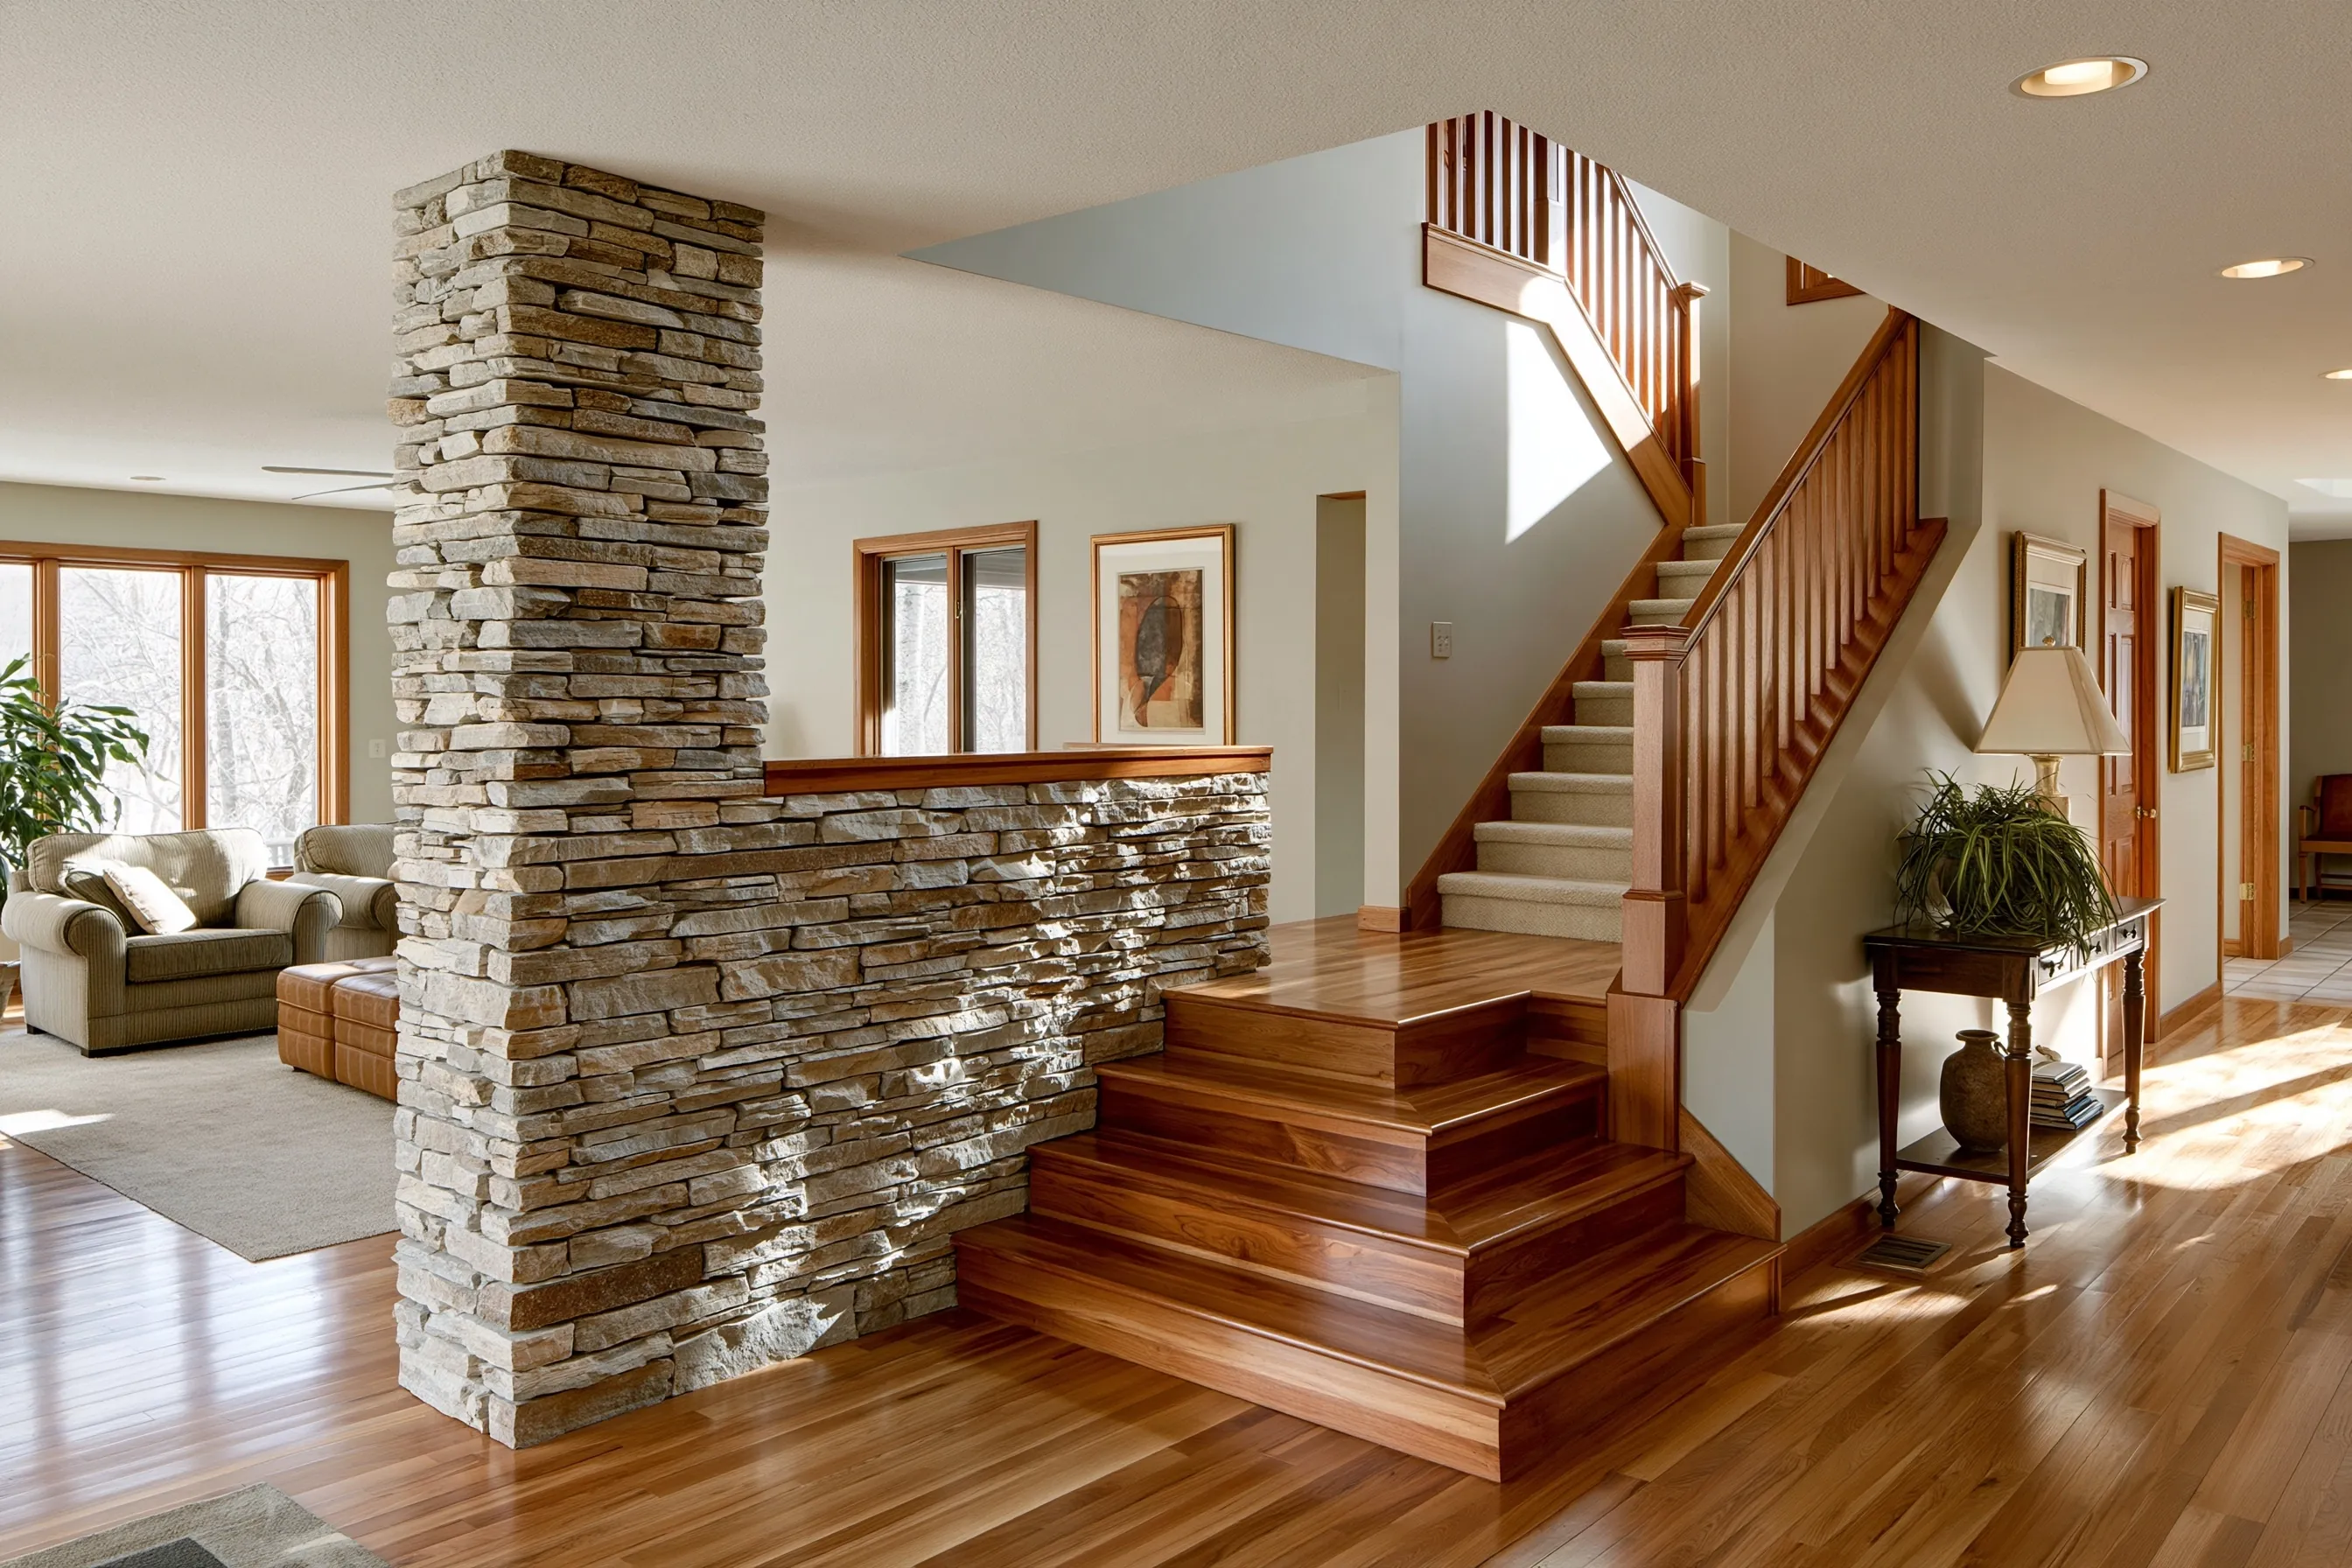
Stacked stone half wall with a wood cap and a stone post up to the ceiling, between a living room and an entry stair
Home
1990s house in Federal Way
Original request
Make the drywall half wall and post by the entry stair look solid and stand up to wear
Wall
Half wall about 42 inches tall and 8 ft long, faced on both sides, plus the post at its end up to the ceiling, about 100 sq ft
Stone
Thin manufactured stacked stone on cement backer board, with corner pieces on the post
Top
The existing wood cap, taken off and put back
Timeline
Four days
Estimated cost
$4,900

Scope of work

The wood cap taken off and the outlet box extended. Cement backer board on both faces of the half wall and on the post, thin stone set and cut around the outlet, corner pieces on every edge of the post up to the ceiling, joints finished and the cap put back. The floor is covered while we work.

Project overview

In this example, the owners of a 1990s house in Federal Way have a painted drywall half wall and post between the entry stair and the living room. Bags, shoes and the vacuum keep marking it, and they want it to look like solid stone.

Stone adds thickness to each face, so we check the cap still overhangs and the stair trim still lines up before choosing it. The outlet on the living room side gets an extension ring so its cover sits flat on the new face.

The goal

The goal is a half wall and post that look like solid stone from the stair and from the sofa.

Process

  1. Before work Stone chosen from a sample board, the cap lifted off and the outlet box extended.
  2. Day one Floor covered, backer board fixed to both faces and the post.
  3. Day two Stone set on the half wall and cut around the outlet.
  4. Day three The post faced up to the ceiling, with corner pieces on every edge.
  5. Day four Joints finished, the wood cap put back and the floor cleaned.

Planning right

  • We cover the floor before any stone is cut indoors.
  • Corner pieces on every edge of the post make it read as solid stone.
  • An outlet in the wall needs an extension ring so the cover sits on the stone.
  • Check the wood cap still overhangs both faces once the stone adds its thickness.

Get a free quoteMore about interior stone accent walls

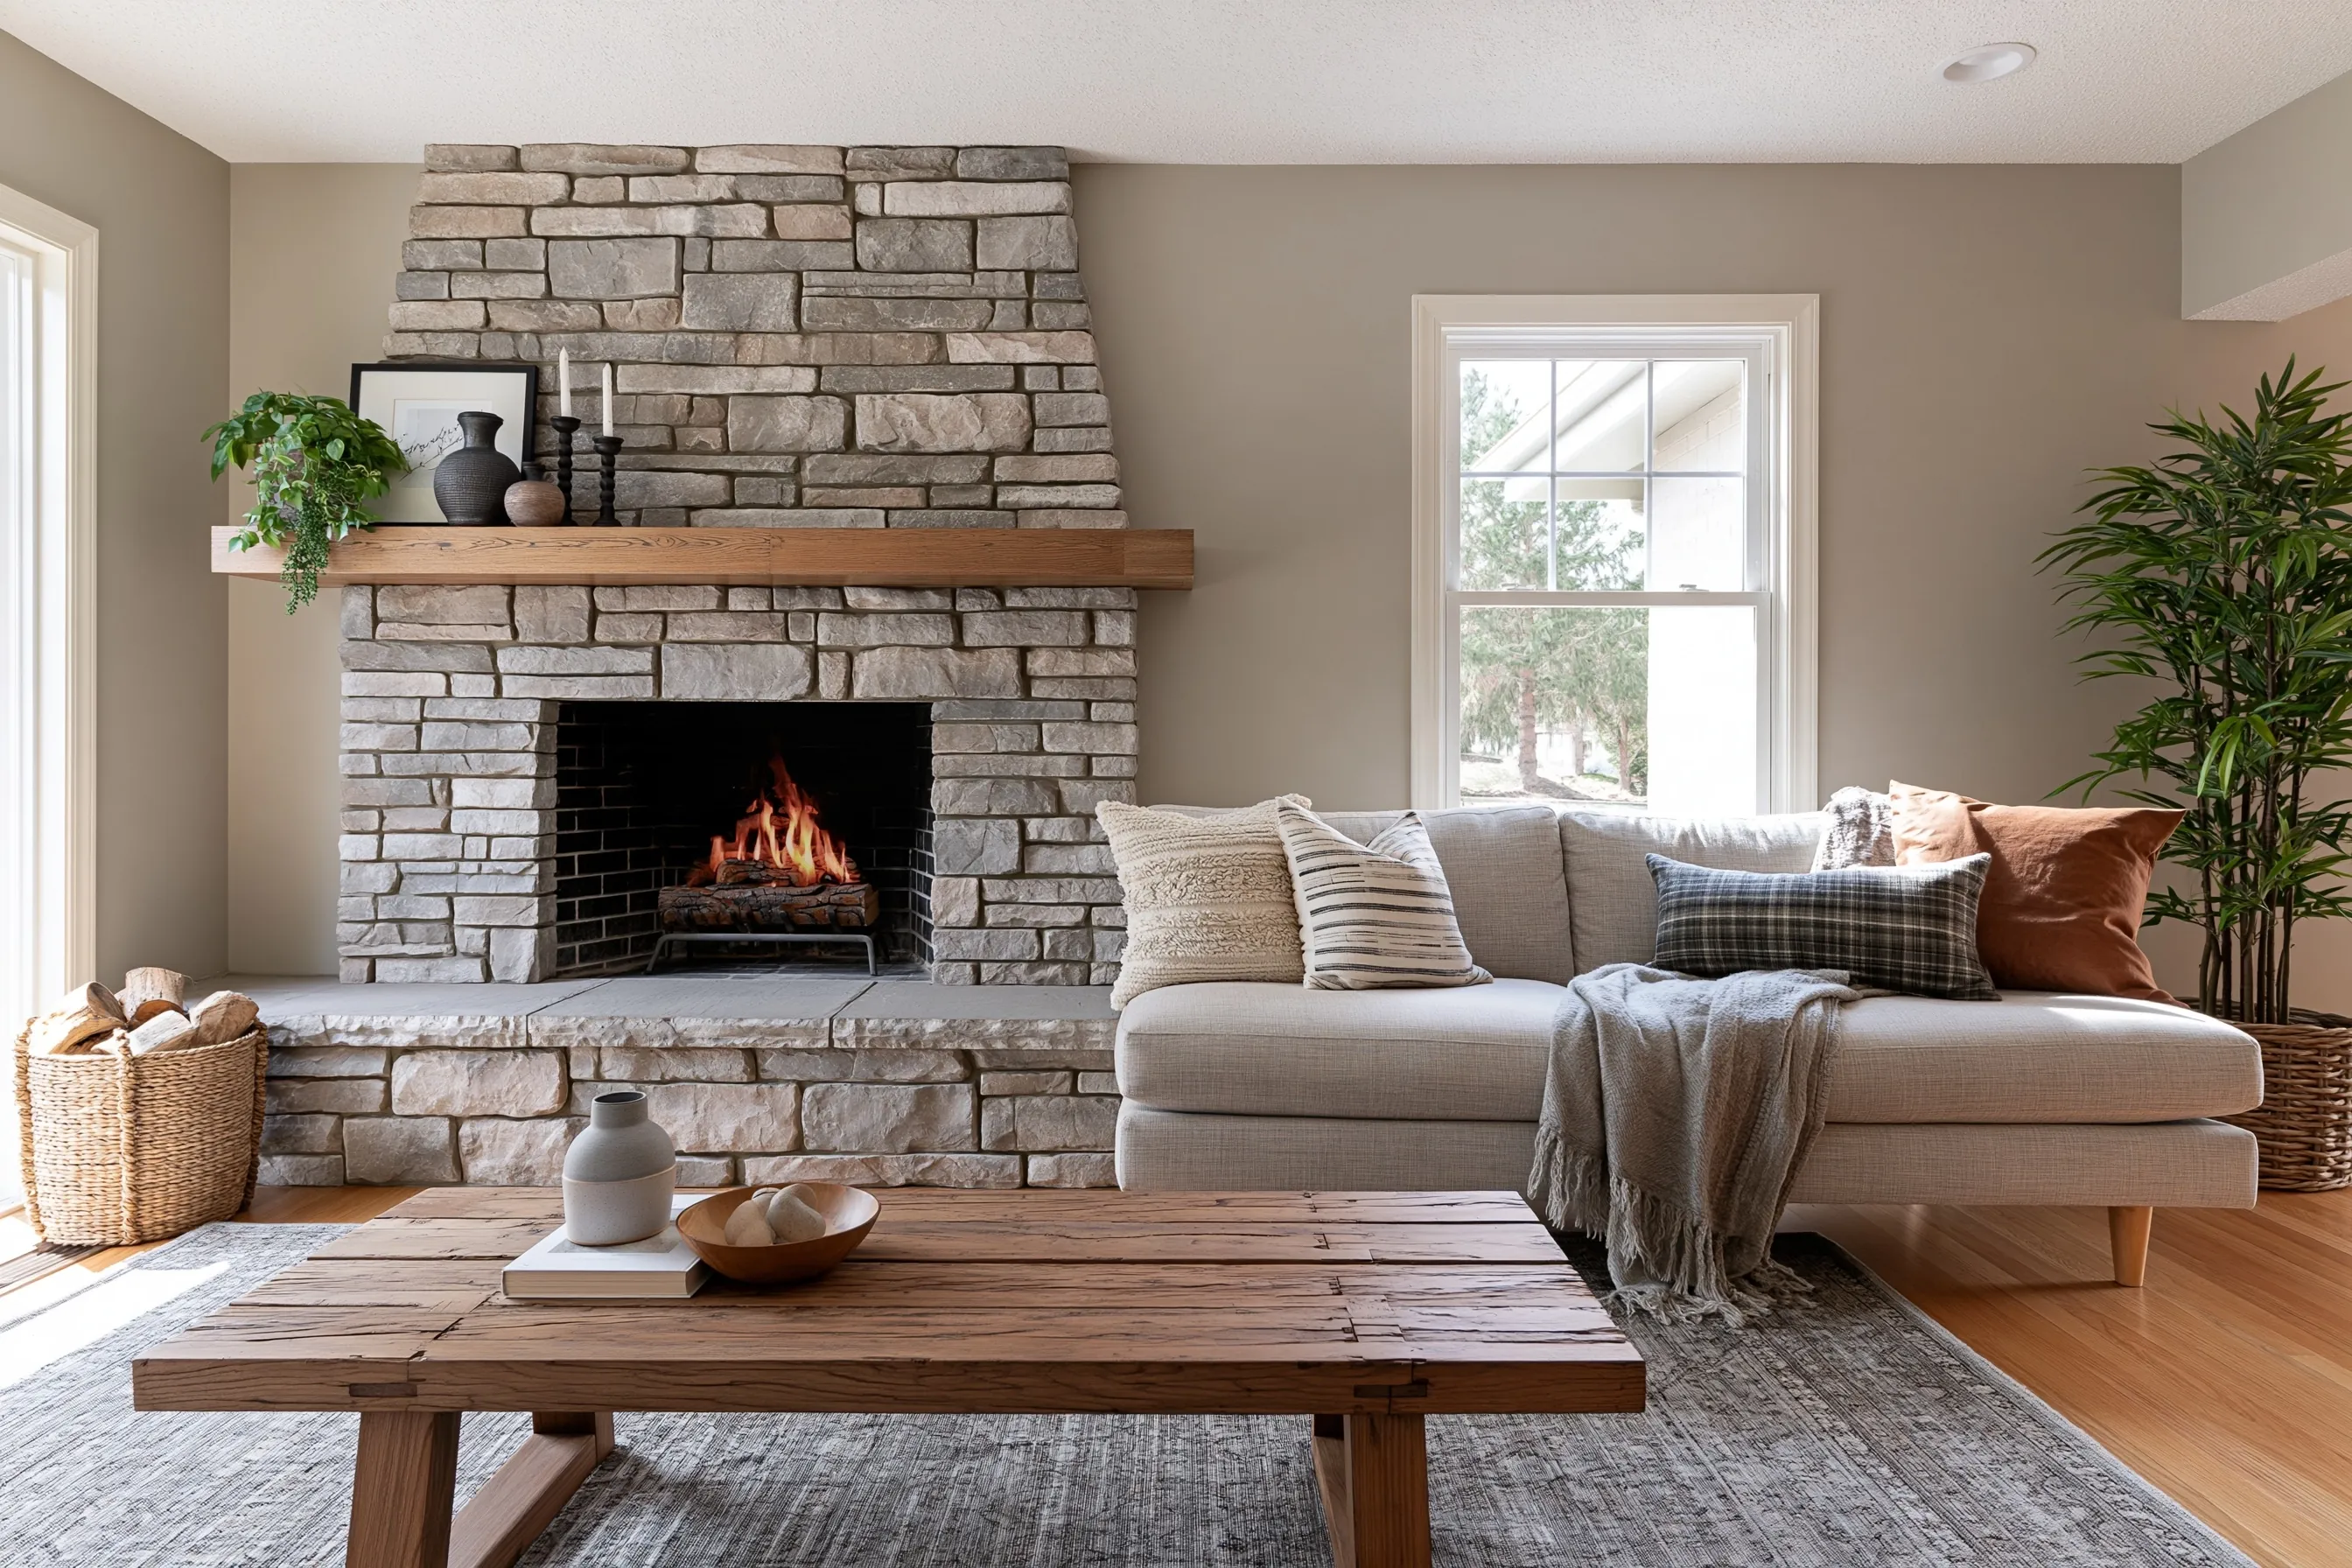
Dark brick fireplace refaced in stone

Example project

Fireplace in a rambler living room faced in light stacked stone up to the ceiling, with a wood mantel and a long raised stone hearth
Home
1970s rambler in Des Moines
Original request
Cover the dark brick around the fireplace and add a wood mantel
Surround
Painted brick from the hearth to the ceiling, about 5½ ft wide, about 28 sq ft
Hearth
Long raised brick hearth faced in stone and topped with flat stone, about 10 sq ft of face
Kept
The wood-burning firebox and the chimney, unchanged
Timeline
Three days
Estimated cost
$3,500

Scope of work

The brick cleaned, metal lath fixed over it and a scratch coat put on. Stone set from the hearth to the ceiling around the firebox opening with cut edges, the raised hearth faced and topped with flat stone, and the owners’ wood mantel fixed at a safe height above the opening. The firebox and chimney are not changed.

Project overview

In this example, the owners of a 1970s rambler in Des Moines have a dark painted brick fireplace with a long raised hearth. The fire draws well, so they want a new face, not a new fireplace.

Painted brick will not hold mortar well, so we fix metal lath over it before the stone goes on. A wood mantel has to sit far enough above the fire, so its height is marked before any stone is set.

The goal

The goal is a new stone face, hearth and mantel around the same working fireplace.

Process

  1. Before work Stone chosen and the mantel height marked on the wall, a safe distance above the opening.
  2. Day one Brick cleaned, lath fixed over it and the scratch coat put on.
  3. Day two Stone set around the opening and up to the ceiling, the hearth faced and its flat top laid.
  4. Day three Joints finished, the mantel fixed and the room cleaned up.

Planning right

  • We do not change the firebox or the chimney.
  • Ask for the mantel height to be checked against the space a wood mantel needs above the opening.
  • Painted brick needs lath before stone will stay on it.
  • Plan where the stone stops at the side walls so it ends on a clean edge.

Get a free quoteMore about stone fireplace surrounds

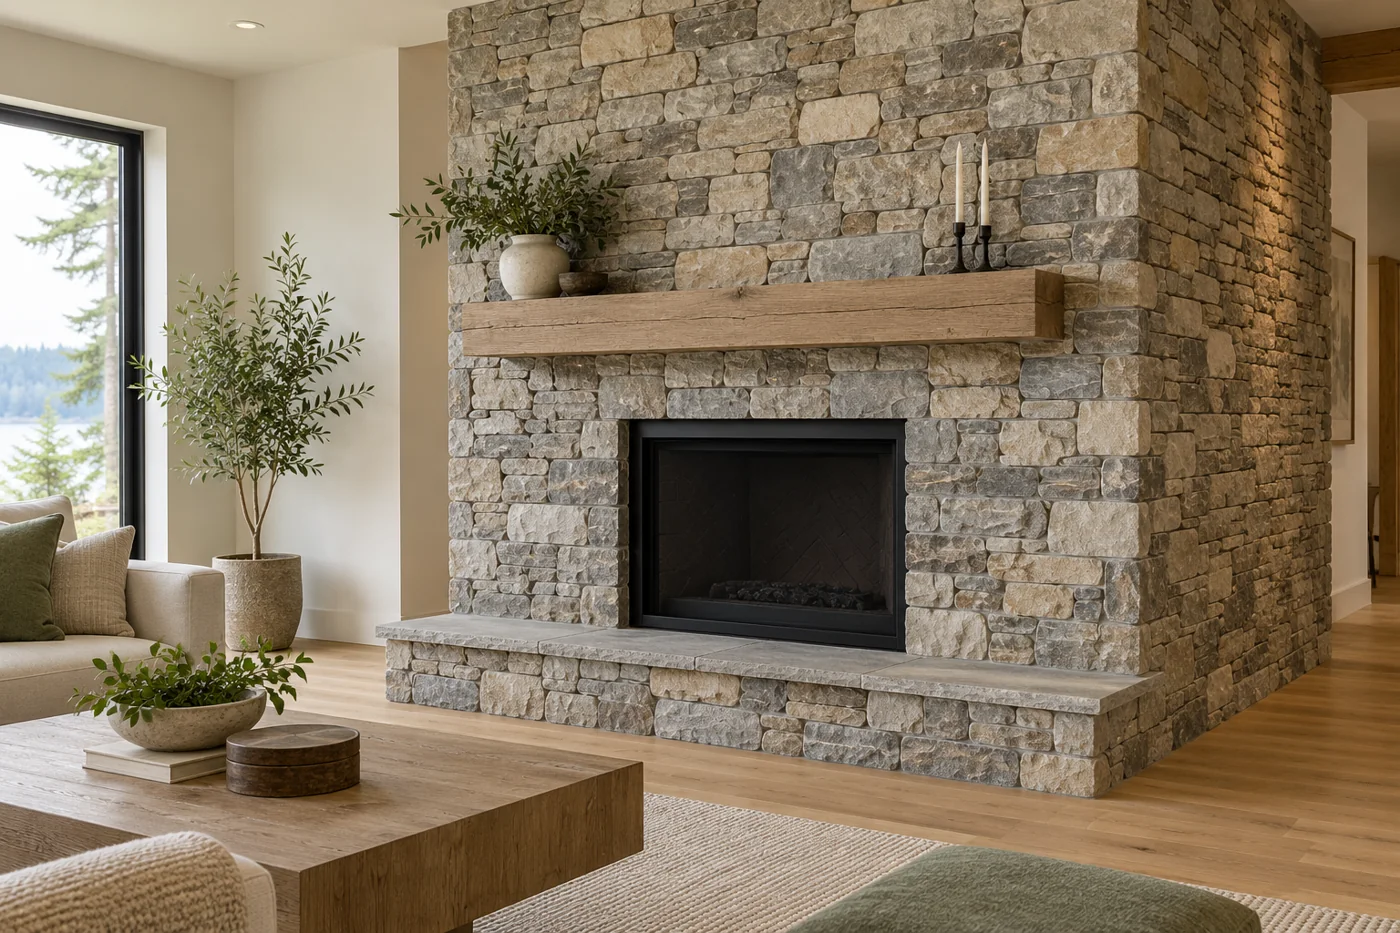
Floor-to-ceiling stone wall around a new gas fireplace

Example project

Floor-to-ceiling stone fireplace wall with a wood beam mantel, a long raised stone hearth and the stone wrapping the side
Home
1990s house in Kent, living room being remodeled
Original request
Stone from the floor to the ceiling around the new gas fireplace
Wall
Fireplace wall about 8 ft wide and 9 ft tall, plus the side return, about 105 sq ft
Hearth
Raised stone hearth across the front with a flat stone top
Mantel
Wood beam, fixed to blocking the builder set in the framing
Timeline
Four days, after the fireplace is in
Estimated cost
$5,600

Scope of work

Cement backer and lath on the new chimney box, a scratch coat, the raised hearth faced and topped with flat stone, then the front and side return faced to the ceiling with corner pieces, the beam fixed and the joints finished. The fireplace, gas line and framing are the remodel builder’s work.

Project overview

In this example, the owners of a 1990s house in Kent are remodeling their living room. Their builder has framed a new chimney box for a gas fireplace, and they want it faced in stone up to the ceiling, with a raised hearth and a wood beam for a mantel.

We start once the fireplace is in and its clearances are marked. The stone also runs around the side of the box, so from across the room it looks like solid masonry rather than a facing on one wall.

The goal

The goal is a stone fireplace wall that reaches the ceiling and keeps the clearances the fireplace needs.

Process

  1. Before work Clearances marked from the fireplace manual and the stone laid out on the floor to spread the colors.
  2. Day one Backer board and lath fixed, scratch coat on.
  3. Day two Raised hearth faced and topped.
  4. Days three and four Front and side faced up to the ceiling, beam fixed, joints finished.

Planning right

  • Lay the stone out on the floor first so the colors spread evenly.
  • A heavy beam needs solid blocking, set before the backer board goes on.
  • Leave a way to reach the fireplace controls.
  • Facing the side of the box costs more but looks far more solid.

Get a free quoteMore about stone fireplace surrounds

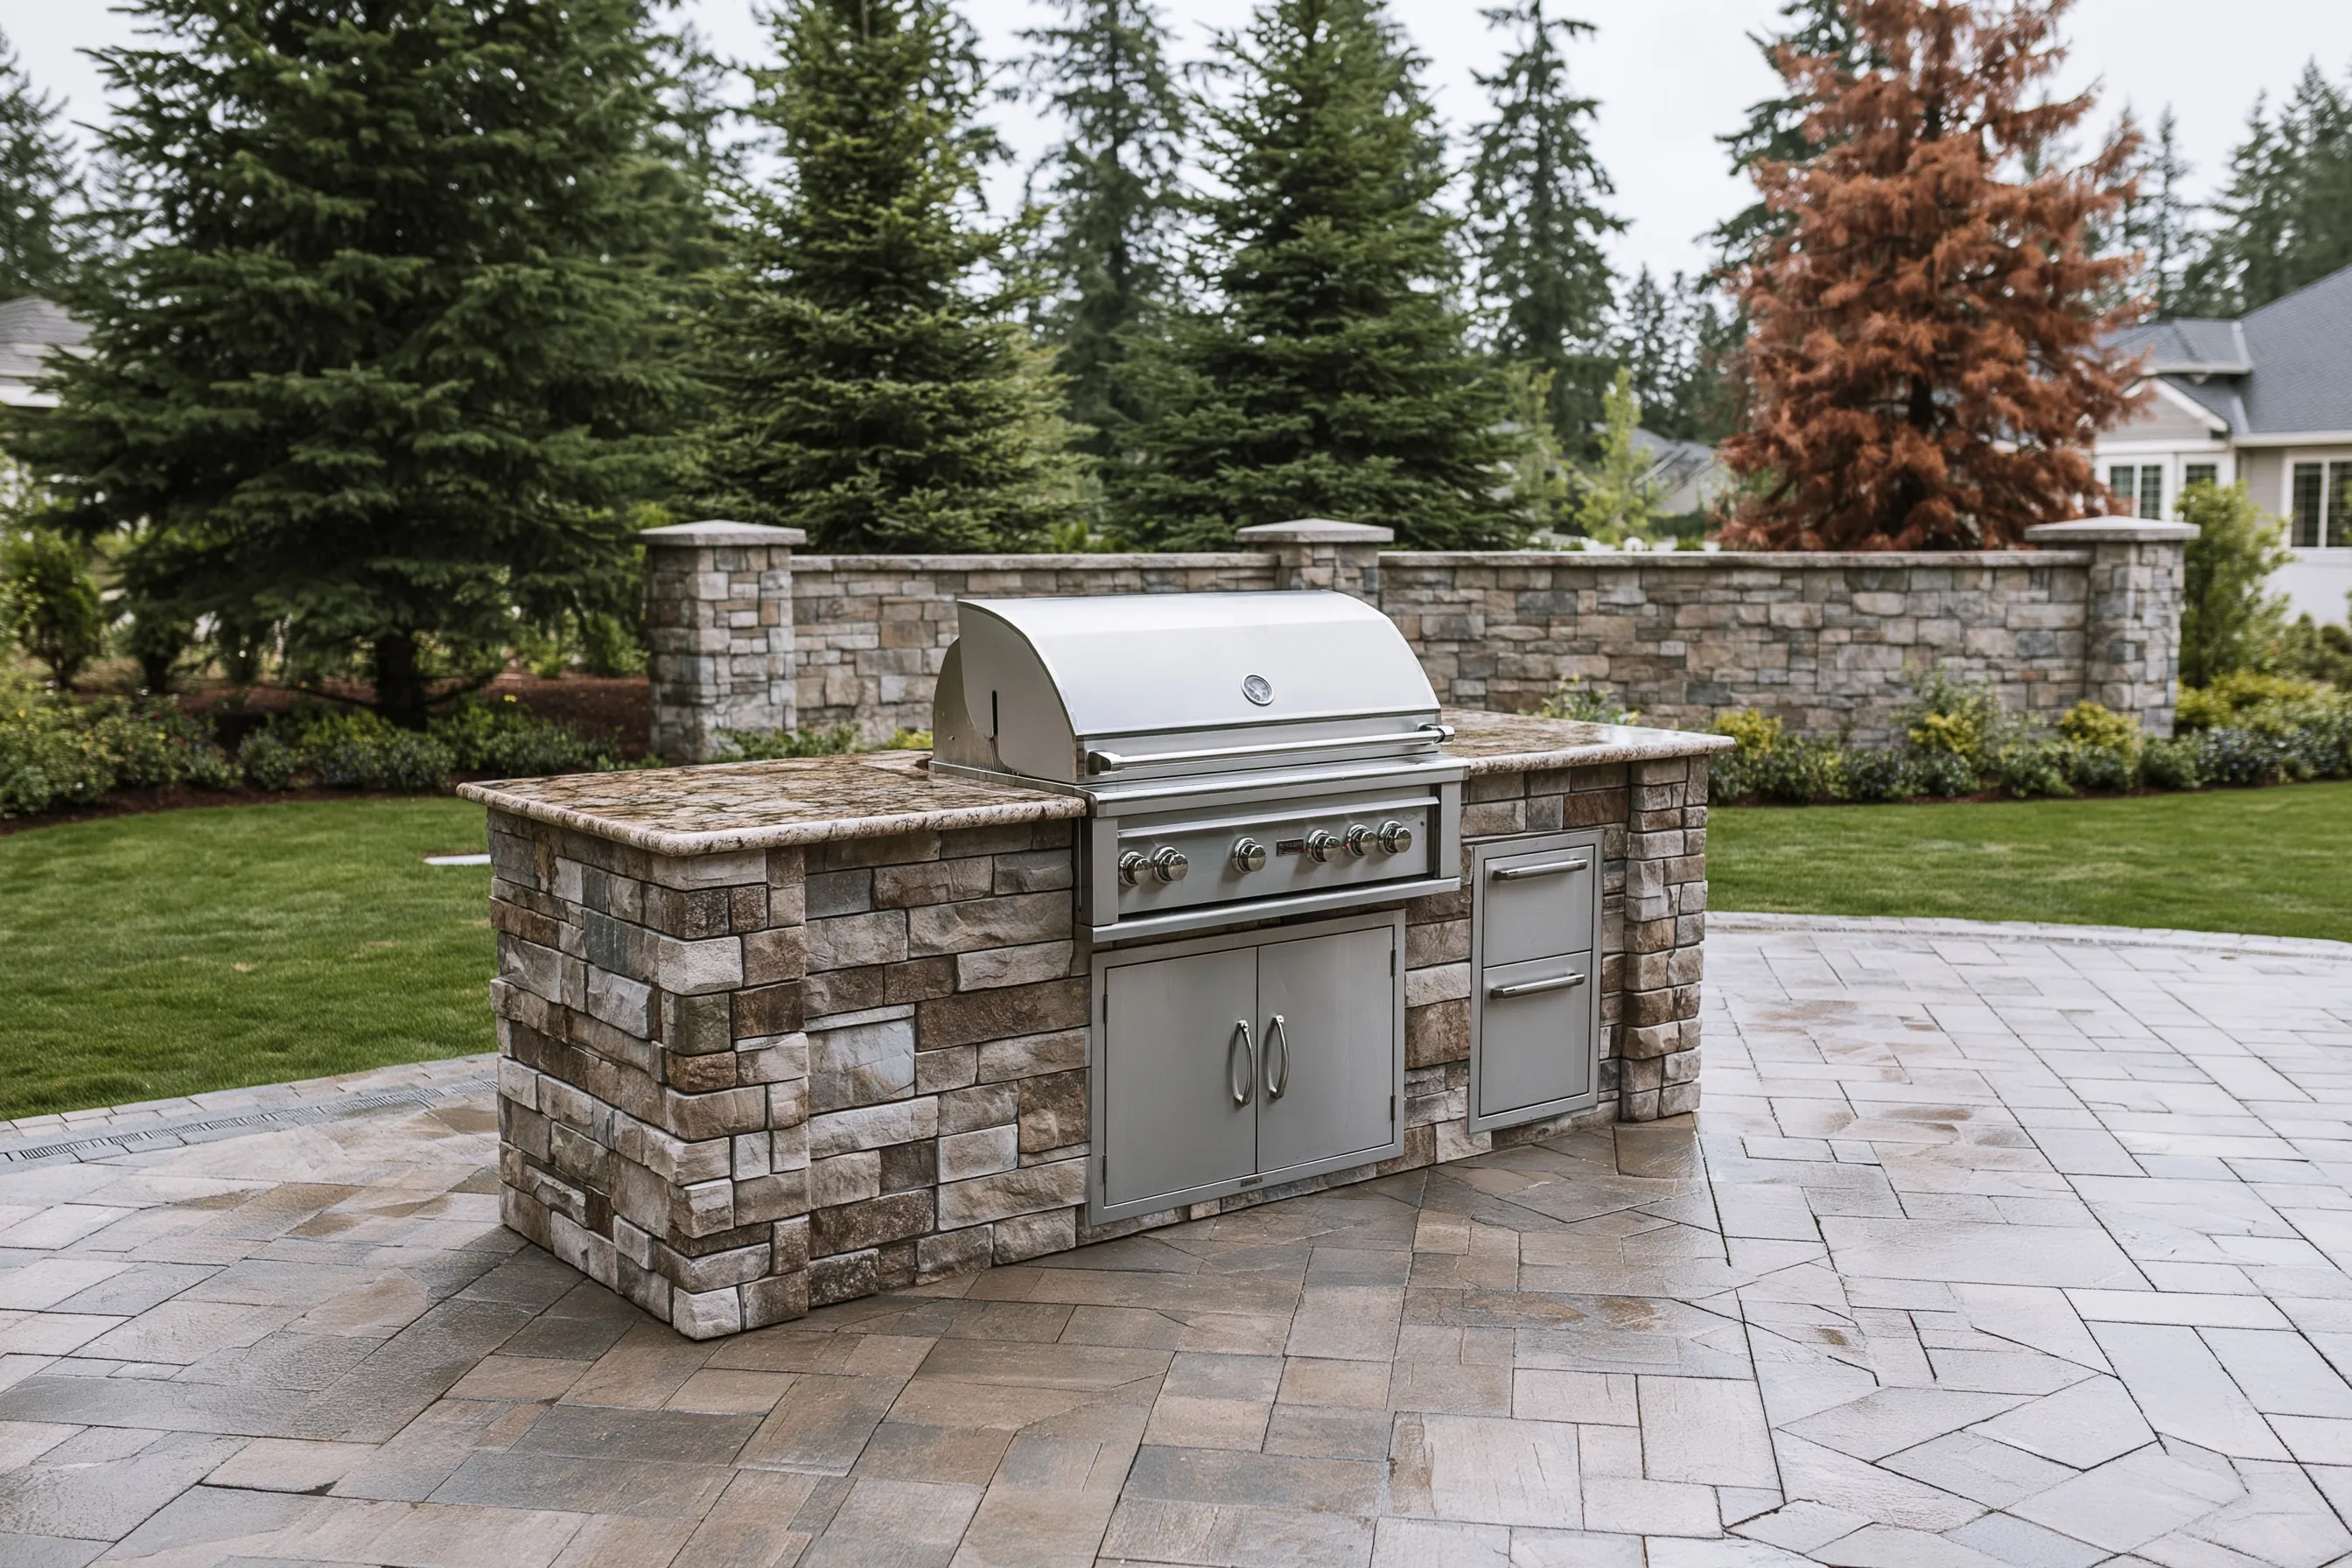
Tiled grill island refaced in stone

Example project

Stone grill island with a granite top, a stainless grill, double doors and a drawer stack on a paver patio, with a low stone wall and pillars behind
Home
1990s house in Auburn with a paver patio
Original request
Replace the cracked tile on the sides of the grill island
Island
Block island about 8 ft long, about 50 sq ft of sides to face
Kept
The grill, the granite counter, the doors and the drawers
Garden wall
Low stone wall with pillars across the back of the yard, already there
Timeline
Three days
Estimated cost
$2,600

Scope of work

Loose tile chipped off the sides, metal lath and a scratch coat over the block, stone with corner pieces at both ends, cut neatly around the grill, the doors and the drawers, and the gap under the counter edge sealed. The grill and counter stay as they are.

Project overview

In this example, a family in a 1990s Auburn house wants new sides on their grill island. A few winters of rain and frost have cracked the tile and pushed some of it off. The grill and counter are fine.

We chip off whatever is loose before facing the block, so nothing new sits on a weak layer. The stone stops just under the counter edge, so rain drips off the counter and not into the top of the facing.

The goal

The goal is a grill island with solid stone sides that stop shedding pieces every winter.

Process

  1. Before work Stone samples held up beside the garden wall, the doors and drawers measured.
  2. Day one Loose tile chipped off, lath fixed and scratch coat on.
  3. Day two Stone set with corner pieces at both ends and cut around the doors and drawers.
  4. Day three Joints finished, the gap under the counter sealed and the patio washed down.

Planning right

  • We take loose tile off instead of covering it.
  • The counter should overhang the stone so water drips clear of it.
  • Keep the doors, drawers and any vents free to open after the stone goes on.
  • Pick the stone outside, next to the garden wall, not from a photo.

Get a free quoteMore about outdoor stone veneer

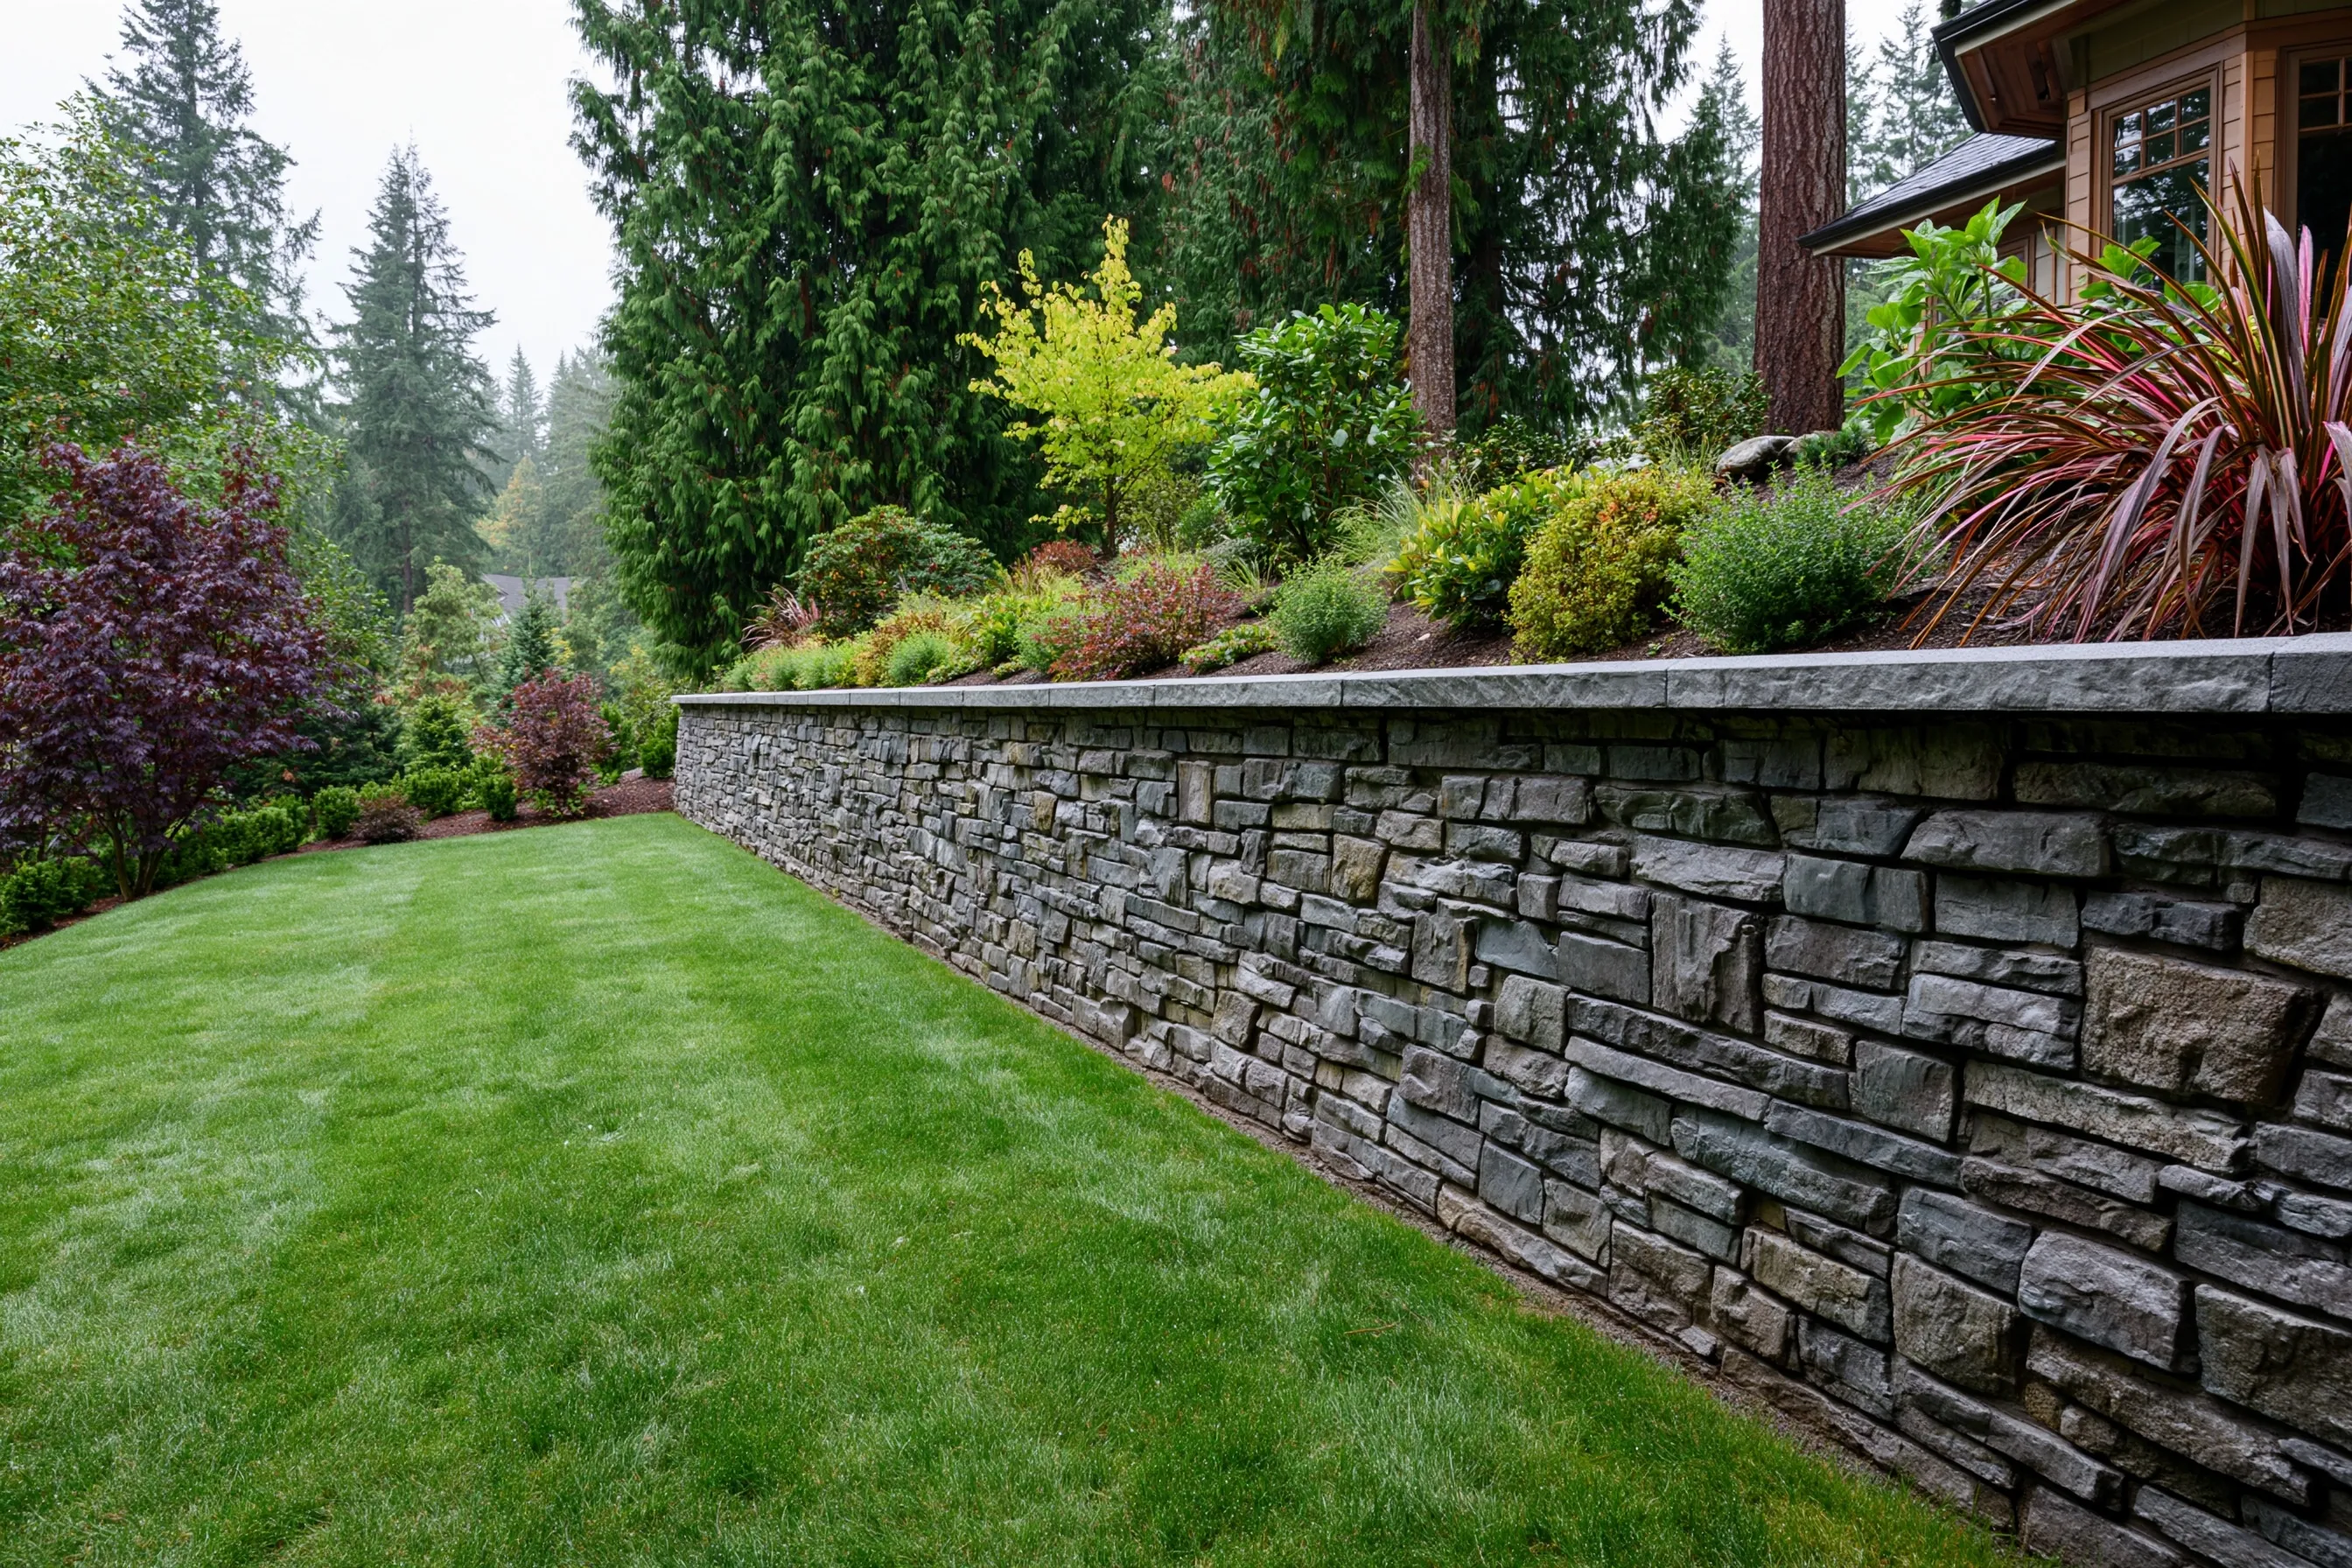
Concrete garden wall faced in stone

Example project

Long stone-faced retaining wall with a flat stone cap, a planted bed above and a lawn below
Home
1980s house in Kent
Original request
Make the bare concrete wall at the end of the garden look like part of the garden
Wall
Concrete wall holding back a raised bed, about 45 ft long and 30 inches tall, about 115 sq ft of face
Cap
Flat stone cap along the top
Drainage
The wall’s weep holes carried through the stone and left open
Timeline
About a week
Estimated cost
$6,300

Scope of work

The wall checked for leaning, cracks and drainage. The face cleaned, metal lath and a scratch coat, stone set along the wall with the weep holes kept open, and a flat cap that overhangs the face. The beds at the base are tidied at the end.

Project overview

In this example, the owners of a 1980s house in Kent have a plain concrete wall holding back a raised bed at the end of the garden. It is sound, but it looks like a foundation.

Before we price it, we check that the wall is not leaning or cracked and that water still drains out through its weep holes. The stone is a facing only, so those holes are carried through it and stay open.

The goal

The goal is a stone garden wall that still drains the way it did before.

Process

  1. Before work Wall looked over for lean, cracks and blocked weep holes, then the stone and cap picked.
  2. Days one and two Face cleaned, lath fixed and scratch coat on.
  3. Days three to five Stone set along the wall, with every weep hole kept open.
  4. Last day Flat cap set, joints finished and the beds tidied.

Planning right

  • If a wall leans or cracks, it needs a structural look before any stone goes on.
  • Weep holes must stay open through the stone.
  • A cap that overhangs the face sheds rain away from the joints.
  • Leave a small gap between the stone and the soil at the base.

Get a free quoteMore about outdoor stone veneer

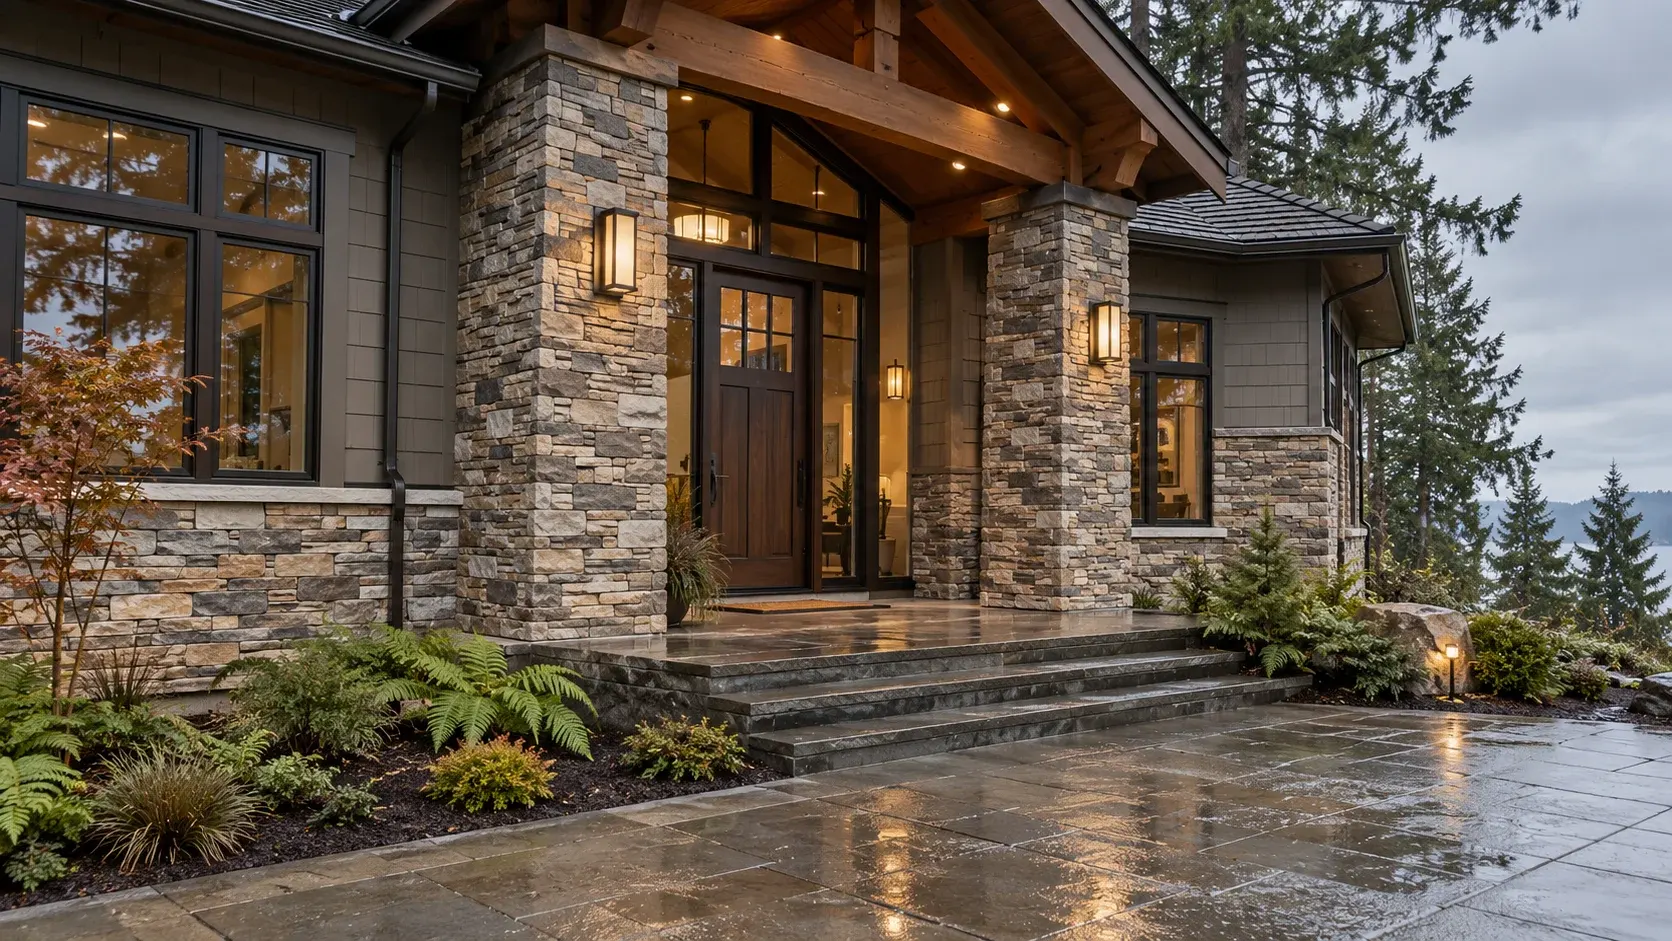
Two entry posts wrapped in stone to the beam

Example project

Two full-height stone columns at a front door under a timber porch, with a stone band below the front windows
Home
1990s house in Federal Way, looking out over the water
Original request
Wrap the two painted posts at the front door in stone
Columns
Two square posts about 2 ft wide and 9 ft tall, three faces each, about 110 sq ft of stone
Lower walls
Stone band under the front windows, already there
Lights
A wall light on each post, taken down and put back on the stone
Timeline
About a week
Estimated cost
$5,900

Scope of work

Lights taken down and their boxes extended. A water barrier, lath and a scratch coat on the three faces of each post, stone from the porch floor to the beam with corner pieces on every edge, a clean finish under the beam and the lights put back.

Project overview

In this example, the owners of a 1990s house in Federal Way already have a stone band under their front windows, but the two posts at the front door are plain painted boxes. They want the posts in stone from the porch floor to the beam.

Each post gets a water barrier, lath and stone on the three faces that show. We bring samples to the porch and hold them against the band that is already there before anything is ordered.

The goal

The goal is two entry posts that look as solid as the stone band beside them.

Process

  1. Before work Samples checked against the stone band, lights taken down.
  2. Days one and two Water barrier, lath and scratch coat on both posts.
  3. Days three to five Stone laid on both posts up to the beam, with corner pieces on all eight edges.
  4. Last day Joints tooled, the lights rehung and the porch swept.

Planning right

  • Corner pieces on every edge stop a column looking hollow.
  • Finish the top under the beam so water cannot sit on the stone.
  • Light boxes need extending to the new face.
  • Protect the porch floor while mortar is mixed.

Get a free quoteMore about porch column and entryway stone

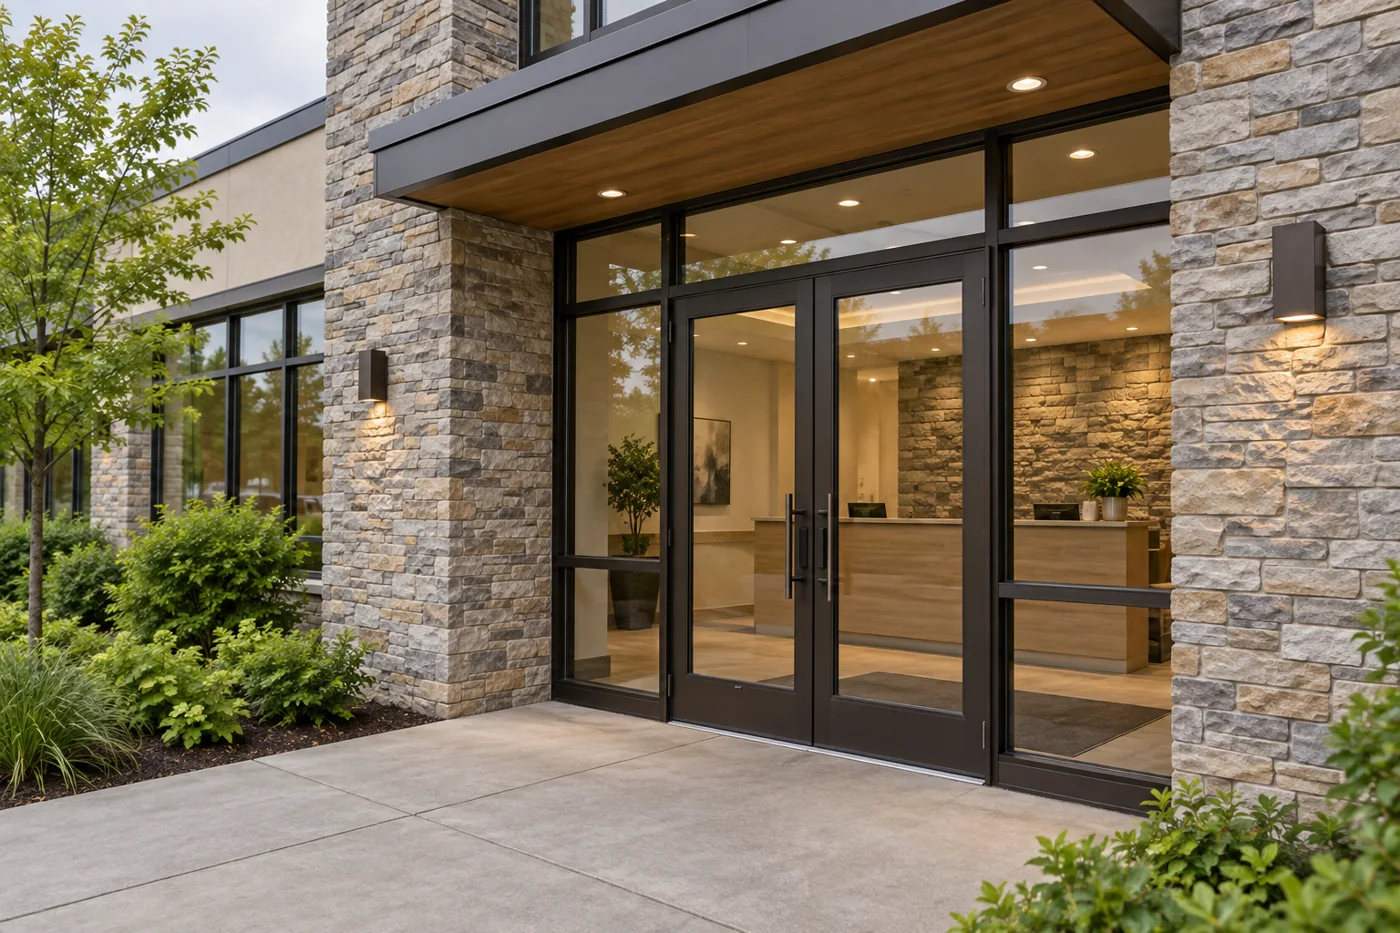
Clinic entrance and reception wall in one stone

Example project

Building entrance with two tall stone piers and a stone wall by glass doors, and a stone reception wall behind a wood front desk inside
Building
2000s two-story medical clinic in Federal Way, with a side door off the parking lot
Original request
A stone entrance, with the same stone on the wall behind the front desk
Outside
Two tall piers and the wall beside the doors, about 380 sq ft
Inside
Reception wall behind the front desk, about 120 sq ft
Not in this cost
A lift for the tall piers and any after-hours work, quoted separately
Timeline
About three weeks
Estimated cost
$21,500

Scope of work

The front doors closed behind a fence while the outside work runs, with signs to the side door. Outside, the old finish taken off the piers and the wall by the doors, a water barrier, flashing, lath and scratch coat, and stone with corner pieces. Inside, cement backer on the reception wall and the same stone set behind a dust screen. The lift for the upper piers and any work outside business hours are quoted separately.

Project overview

In this example, the owner of a 2000s medical clinic in Federal Way wants the main entrance to stand out, and the reception wall inside to look like part of the same front. The clinic has a side door off the parking lot, so patients use it for the two weeks the front doors are fenced off.

Outside, the stone goes on two tall piers and the wall beside the doors, over a water barrier and lath. Inside, the wall behind the front desk gets the same stone on backer board. One set of samples is approved for both, so what people see through the glass matches what they walk past outside.

The goal

The goal is an entrance and a reception wall that read as one stone front, with the clinic open the whole time.

Process

  1. Before work Samples approved by the owner, and signs put up sending patients to the side door.
  2. Week one Old finish off the piers, water barrier, lath and scratch coat on.
  3. Week two Stone set on the piers and the wall by the doors.
  4. Week three Front doors back in use, reception wall faced behind a dust screen, then a final clean.

Planning right

  • Check the side door is wide enough and has a ramp before the front is fenced off.
  • Approve one set of samples for inside and outside.
  • The lift and any evening work come as separate prices, so ask for them up front.
  • Settle where the clinic sign and wall lights are fixed, so their anchors and boxes go in with the stone.

Get a free quoteMore about commercial stone veneer

Request a free stone veneer quote

Tell us which wall or feature you want in stone, roughly how big it is, what is on it now and where the property is. Photos help. We'll get back to you soon to arrange a visit or with any questions we have. Estimates are free and there's no obligation.

Call (253) 785-6675